Now that you have a new dataset containing a number of positive and negative examples, you can use it to create models that predict the terrain type (snow or no snow)
Create models
Before you can create your candidate models, you must select the target feature to predict (your new snow label) and the other features (including the tiles) you think will aid in the prediction.
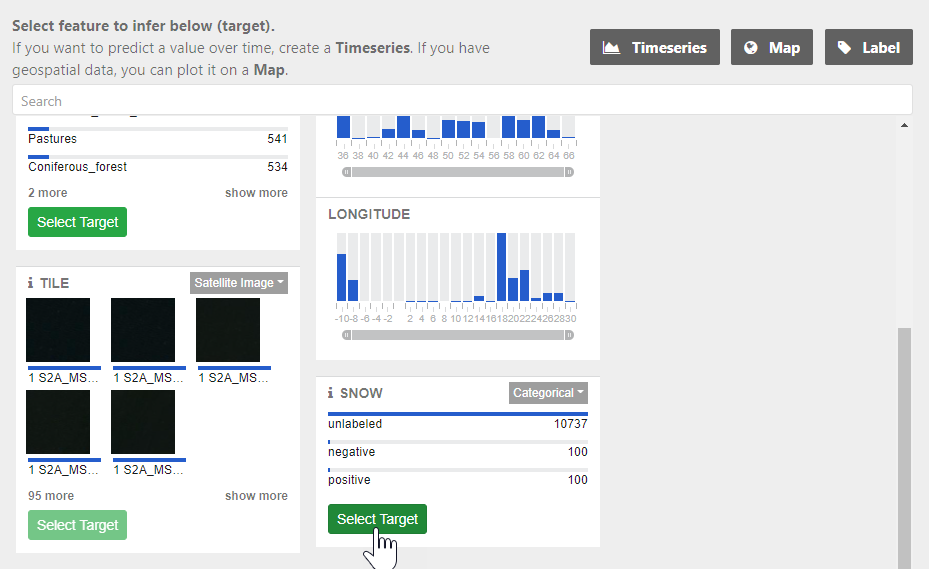
- In the Select Target view, find your new label feature and click Select Target.
- In the Select Model view, find the Tile feature and click Add to indicate that the model should use it to predict the label.
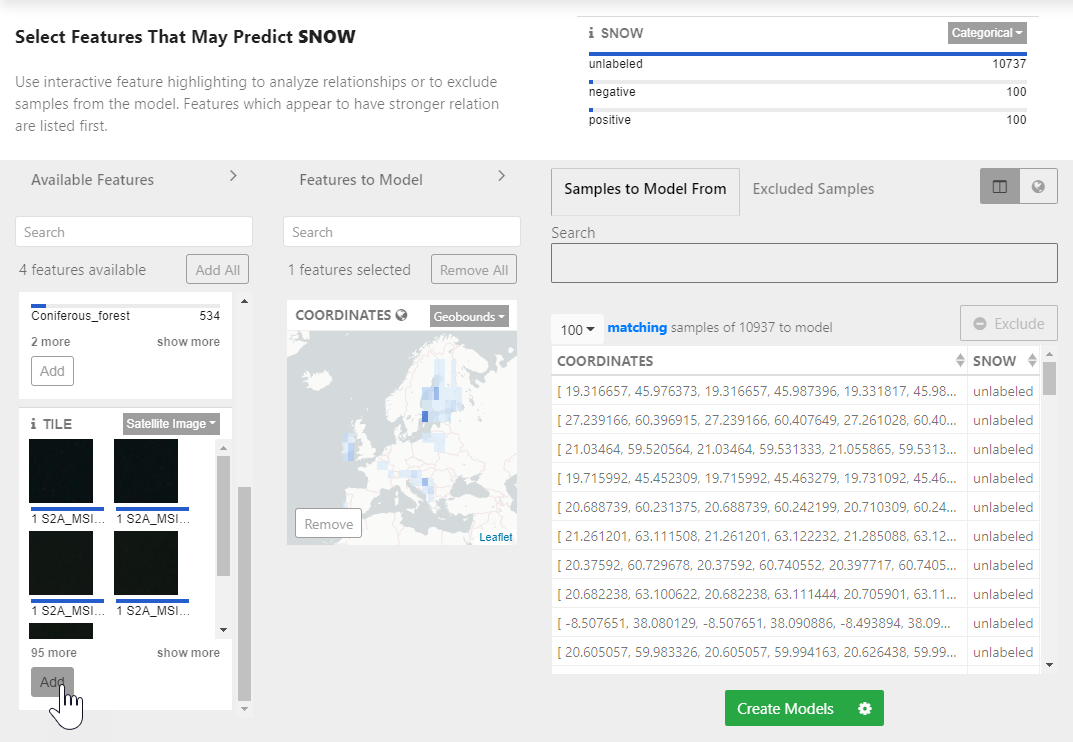
You can also Add any other relevant features, such as geographic coordinates, that you think may help the predictions.
- Click Create Models.
Check model results
The Check Models view lets you see how your models performed compared your own manual labeling. The Results panel on the rights shows:
- The total positive and negative predictions made by each model, which you can compare with the Ground Truth labels in your saved dataset
- The number of correct and incorrect predictions
- The confidence the system has that each tile is a positive example on a scale from 0 to 1, where 1 is the most confident
Note: Because confidence is expressed in terms of positive examples, a score close to 0 for a negative prediction is equally as strong as a score close to 1 for a positive prediction.
- A confidence ranking of the predictions
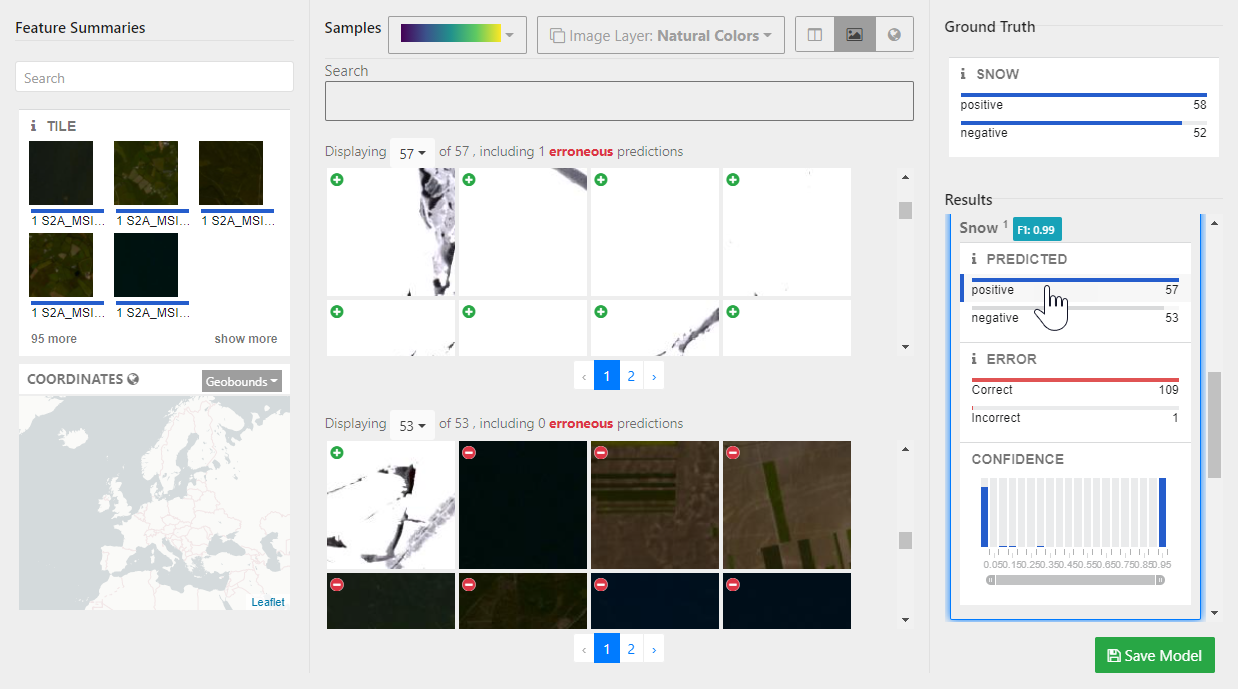
You can interact with these metrics to refresh the Samples table and understand how accurate each model is. As you did when labeling your examples, you can view expand any of the tiles in the Samples table or switch to a tile or map view to see more detail.
If you want to increase the accuracy of your models, go back to the Select Model Features view to adjust the features used to make the predictions. Otherwise, you can save a candidate model and begin to apply it to other datasets.